
| Home | Design Types | General Info | About Us | Contact Us |
|---|
The Service to call before you call a Builder.
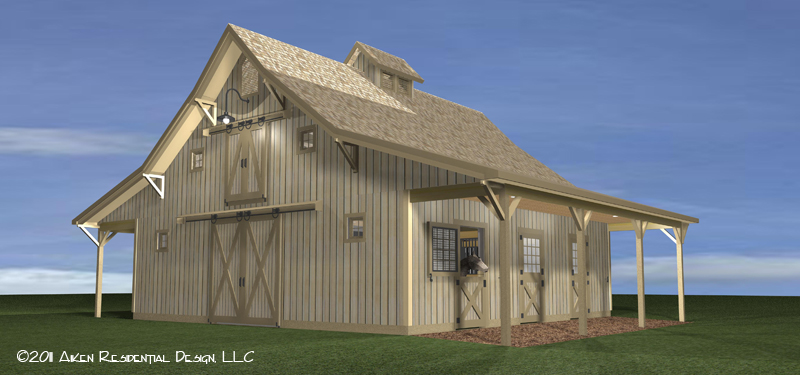
The Northern Pole Barn
The big difference here from the Southern version is the roof design. Governing authorities in Northern climes have building codes that require higher snow loading factors. Trusses with spans between 24 to 48 inches on center are typical. In this example, to contrast with the Southern version, I am showing trusses 24” O.C., ready for a plywood or structure board roof sheathing. If I had used a 48” O.C. spacing, then I would have applied 1x (1”x4” or 1”x6”) purlins on the flat at 24” or 32” spacing from the fascia to the ridge. The former makes for a stronger roof than the latter in part because the plywood sheets form a continuous membrane on each side of the roof, adding superior stiffness compared to purlins.
Another variation demonstrated with this model is the use of girts spaced 24” O.C. vertically on the exterior of the outside wall posts. This renders the exterior ready for vertical siding. Reverse board and batten looks great, HardiPanel is long lasting (and horses find it unappetizing), T-111 is cheaper, or (yuck) metal.
With this type of exterior, stalls are lined with 2x t&g oak or pine board to between 4 and 5 feet above the stall floor. Above that and up to the ceiling, 1x board or plywood is sufficient. In the South, pine is so readily available, that 2x costs only slightly more than 1x, so it is not uncommon to continue it all the way to the ceiling.
There are some advantages to this double wall system. In the Tack Room area, which is generally heated and cooled, the in between space can be filled with insulation. In the stall areas, the inner wall provides a smooth continuous surface free of any sharp edges.
Disadvantages are the loss of space due to the additional thickness of the double wall system, and the potential creation of rodent habitat areas. However, the latter problem should not occur if good construction practices are adhered to by the builder and his workers. To this end, avoid the temptation to leave open the area above the stall inner walls.
If you look closely, you can see another variable in pole barn design demonstrated in this model. Note that the posts on the front and back of the barn have different concrete treatments. On one side, the concrete surrounds the post up to near ground level. In both instances, a concrete footer is placed or poured in the hole prior to the setting of the post. However, on one side the hole has been filled to near ground level with additional concrete, while on the other, the same subsoil that came out of the hole is put back in. The former makes for a more stable post, but adds to the expense. Which method is your builder using? If you are not using an independent designer to create plans for you that require the builder to use specified procedures, this represents one of the many questions to be asked of the builder who is providing his own plans giving you that "to good to be true" quote for your barn.
Of course there is a third way which is superior to both above. This entales using steel brackets set above ground and deeply embeded in the concrete footers, with the posts bolted to plates on the bracket. Or, the third way might utilize a product like Perma Columns. But, unfortunately, these design specifications are rarely seen in contemporary residential construction do to the added cost.
Also demonstrated in this example are the use of attic trusses to create the Loft. This represents a cost saving measure over the use of floor joists and rafters. And while it does save money, it also results in the loss of use of a good portion of the Loft area. But, if you live in the snow belt, and if the overriding rationale driving your choice of construction type for your new barn is to save money, then this may be the right choice.
©2011, Aiken Residential Design, L.L.C.